Windows Mail (Vista): Adding a New Email Account
Window's Mail on Vista is similar
to Outlook Express.
Section 1: Adding a New Account
Section 2: Selecting your Account Settings
Section 3: Configuring your Server Settings
Section 4: Finishing Up
Section 1: Adding a New Account
•
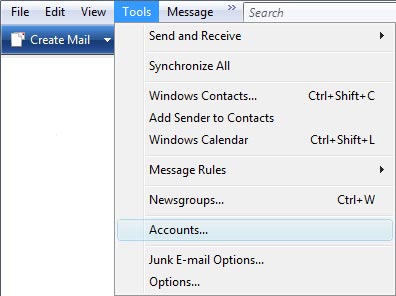
From the Tools menu, select
Accounts.
•
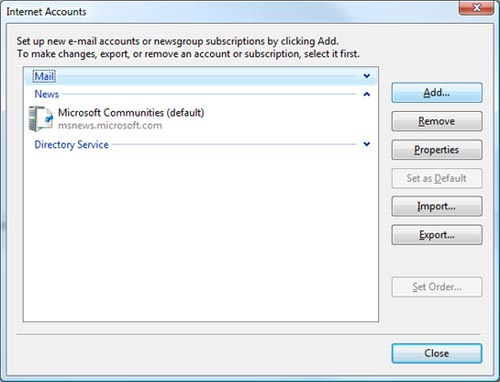
The Internet Accounts dialog box will open. If you
have any email accounts currently setup on your in Windows Mail, they will
appear in the list under the heading Mail.
•
From the buttons on the right-hand side, select Add . .
.
Section 2: Selecting your Account Settings
•
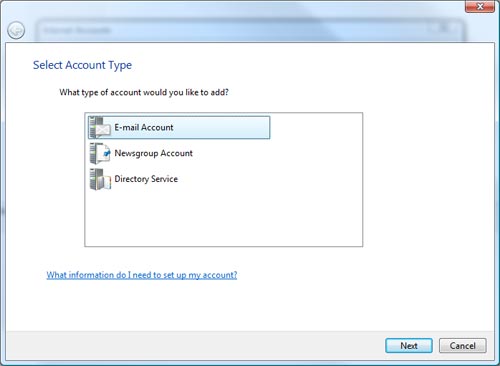
Select E-mail Account as your account type.
•
Then, click Next.
•
Type in the name as you want it to appear when someone
receives a message from this account.
•
Click Next.

•
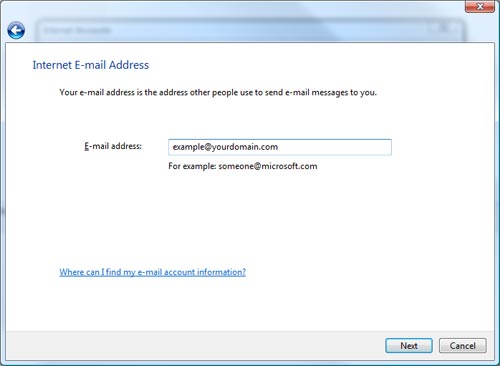
Type in your email address.
•
Click Next.
•
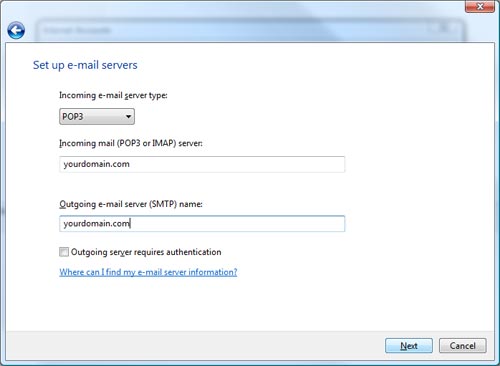
Your incoming mail server and outgoing e-mail server
should both be your domain.
•
Type your domain in each text box, then click Next.
•
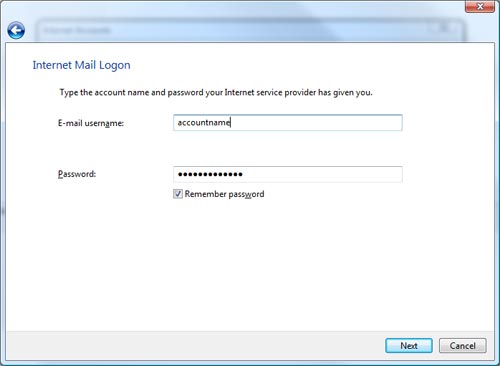
Enter the account name and password for your
email account, provided by Midwest Captions.
•
The username and password are caSe seNsiTive.
•
Verify the Remember password checkbox is checked.
•
This should be the default; if it is not checked, simply
click in the box once for the checkmark to appear.
•
Click Next.
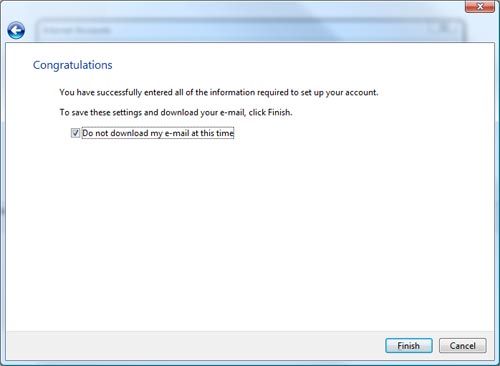
•
On the Congratulations screen, single-click in the
checkbox next to the text Do not download my e-mail at this time.
•
Click Finish.
Section 3: Configuring your Server Settings
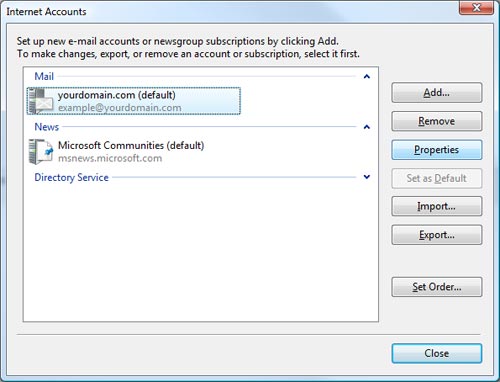
•
You will return to the Internet Accounts screen.
•
Your account should now be listed under the Mail
heading.
•
Click on the account name once, so that it is highlighted.
•
Then, click on the Properties button on the
right-hand side.
•
The Properties dialog box will appear. There are five tabs
across the top; click on the one labeled Servers.
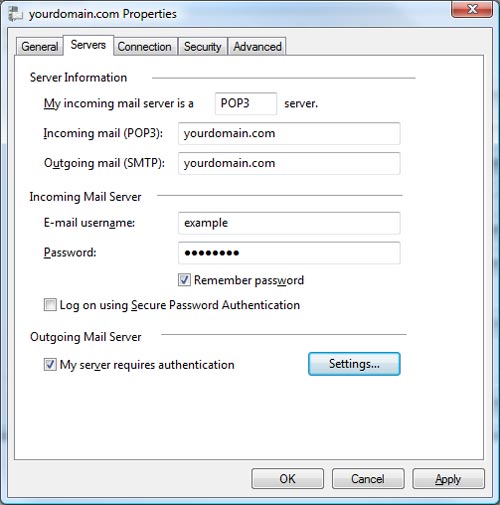 •
Under the Outgoing Mail Server heading toward the bottom, select the
checkbox next to My server requires authentication.
•
Under the Outgoing Mail Server heading toward the bottom, select the
checkbox next to My server requires authentication.
• Click the Settings button.
• Verify the radio button next to Use same settings as my incoming mail server is selected.
• Click OK
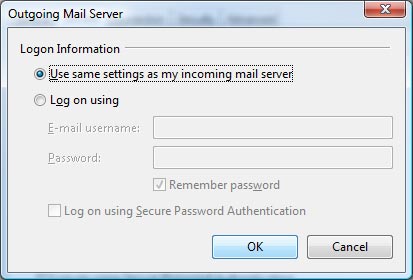
• You'll return to the Properties dialog box.
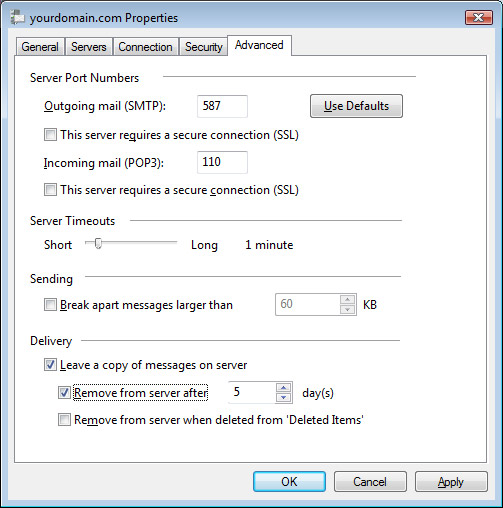
•
The tab on the far right-hand side is labeled Advanced.
•
Click on the Advanced tab.
 •
Change the Outgoing mail port to 587.
•
Change the Outgoing mail port to 587.
•
Keep the Incoming mail port as 110.
•
Under the Deliver heading, check Leave a copy of
messages on server.
•
Next, check the box next to the text Remove from server
after 5 days.
•
Click OK.
•
The Internet Accounts dialog box will appear again.
•
Click the Close button at the bottom of the
right-hand side.
