If Outlook 2007 has never been opened on your computer, refer to the Startup Wizard version of the guide below. If you have already opened Outlook 2007, please refer to the regular Outlook 2007 guide.
Outlook 2007: Setting up Your Email Account (Startup Wizard)
Section 1: Getting Started
Section 2: Account Setup
Section 3: Configuring your Server Settings
Section 4: More Server Settings
Section 5: Finishing Up
Section 1: Getting Started
• Upon opening Outlook 2007, a startup Wizard will load to help you configure your email account.
•
On the welcome screen, click Next.

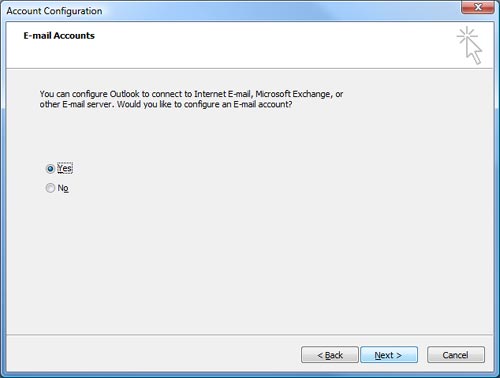
• Select Yes when asked if you would like to configure an E-mail account.
•
Then click Next.
•
On the Account Setup page, enter Your Name
as you’d like others to see it when they receive a message from you.
• Type your E-mail Address and the
password the Midwest Captions has provided you, in the appropriate text
boxes.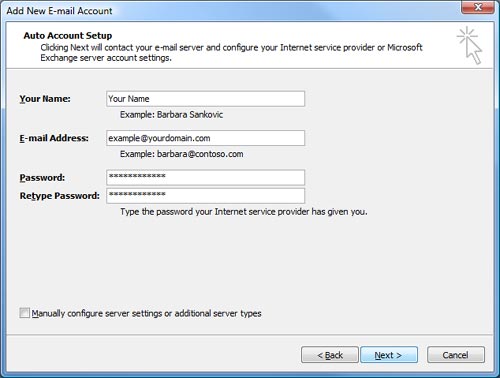
•
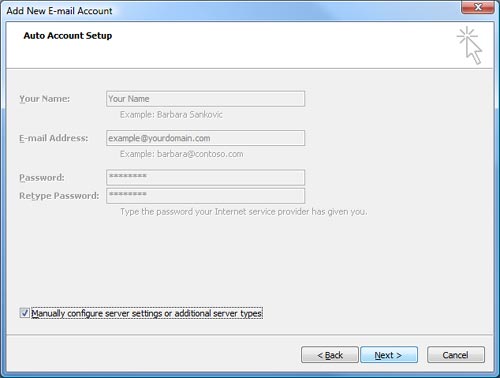
Click in the checkbox next to the text Manually configure server settings or
additional server types so that the checkmark appears.
• Click Next.
Section 3: Configuring your Server Settings
•
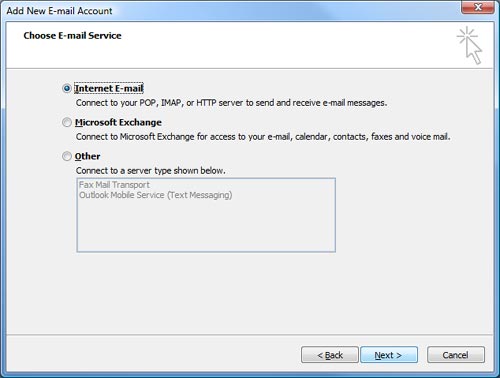
Select Internet E-mail as your E-mail Service.
• Then, click Next.
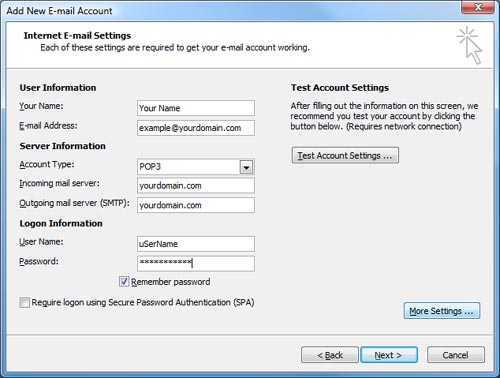 •
On the Internet E-mail Settings screen, the User Information will auto-fill
based on your entries on the previous screens.
•
On the Internet E-mail Settings screen, the User Information will auto-fill
based on your entries on the previous screens.
• Double check Your Name and E-mail
Address for accuracy.
• Under the Server Information heading, select POP3 from the Account Type
drop-down menu.
• Under the Logon Information heading, enter the User Name and
Password that
Midwest Captions has provided you.
• These fields are caSe seNsitiVe.
• Select Remember password.
• Click on the More Settings . . . button on the lower, right-hand side of the
screen.
Section 4: More Server Settings
• From the tabs at the top, select Outgoing Server.
• Check the box next to My outgoing server (SMTP) requires authentication.
• Verify the radio button
next to Use same setting as my incoming mail server is also
selected. (This should be the default.)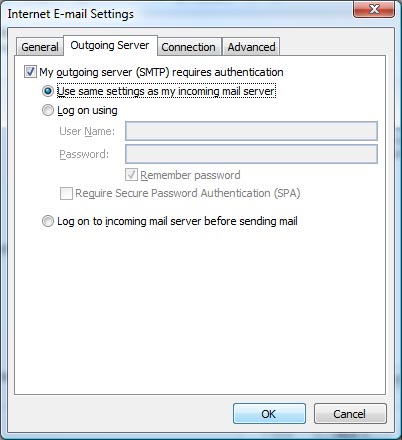
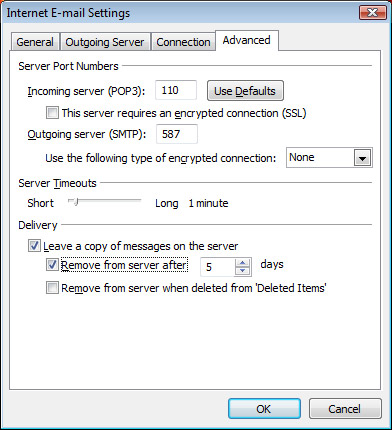
•
Select the Advanced tab.
• Incoming Server should be 110.
• Outgoing Server should be 587.
• Change the Server Ports, as required to reflect the above port numbers.
• Under the Delivery heading, check Leave a copy of messages on the server.
• Then, click Remove from server after 5 days
• You may need to type
5 or
select it using the small up and down arrows in the box next to days.
• Click OK.
Section 5: Finishing Up
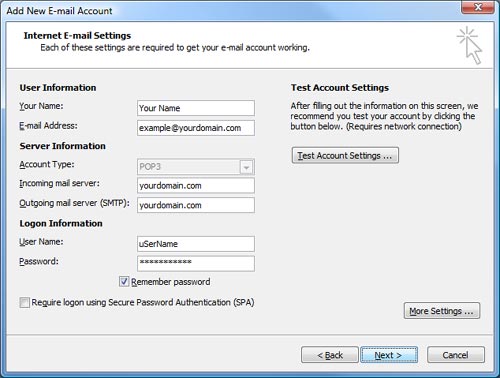
• The Internet E-mail Settings dialog
box will reappear.
• Click Next.
•
A screen will appear telling you that your account setup is complete.
• Click Finish.